Monday, August 1, 2011

College Town Tour: Savannah, GA

In case you didn't know, I'm a contributing writer over at Small Kitchen College. Today my article about Savannah, GA (my college town!) was posted and I wanted to share! If you ever find yourself in Savannah, you now know where to go ;)

While you're over there, check out all of the content from all the other writers. It's a really inspiring site to check out for recipes and lifestyle tips from real life 20 something year olds with real life 20 something year old budgets.

So head on over and learn more about some of my favorite delicious spots around my college town here!

Saturday, July 30, 2011

kinfolk magazine ; issue one


Have you all checked out Kinfolk Magazine? If you haven't already, please do.

In a world where families and friends can hardly gather together without the distraction of smart phones, TV and other gadgets, it's refreshing to see young people putting emphasis on the importance of eating together. It's not all about the food, it's about the company surrounding you. The best kinds of meals shared with the ones you love are the ones that last a long time, just talking, laughing, feeling cozy and close. Kinfolk Magazine focuses on this tradition.


With it's gorgeous photography, perfect layout and thought provoking content, this magazine is absolutely wonderful. Flipping through this issue made me want to gather all of my favorite people and throw a dinner party that will last for hours.

For the first issue, click here.


Friday, July 29, 2011

plates!

Flora & Fauna Dessert Plates $32

When it comes to your kitchen, accessorizing what you're cooking is almost just as important as how well it tastes. With so many great and affordable serving items out there, why not pick up some gorgeous dinnerware? Here are some pretty plates that I've come across and love:

Flights & Fancy Dinner Plate $12-$16

Scott Lifshutz Appetizer Plates $24

Script & Posy Salad Plate $12

Field Study Rimmed Dessert Plates $32

Picnic Time Plate $6

simple summer enchiladas

When you're craving enchiladas, there is almost no way out of it. It's a certain type of craving that really can't be ignored. Okay, it can be ignored. In fact, for the benefit of your health it should be ignored most of the time. However, every once in a while it can be both a delicious and somewhat nutritious meal. Mexican cuisine is probably my favorite ever, but it can be a dangerous thing too often. God knows what restaurants really use back there in the kitchen and what truly goes into your food. The amount of butter and grease involved in restaurant foods like enchiladas can be astounding. So take matters into your own hands! Plus, you can have leftovers (unless you lick the dish clean.)

With dishes like enchiladas, it's important to practice the "use what you have" mentality. Take a look inside of your cabinet, freezer/fridge and see what kind of cheese, meat and veggies you have. Just make sure you have some tortillas, tomato paste and spices.

Buying canned enchilada sauce can be convenient but it can also lead you into a mysterious situation. Ask yourself: What is truly in it? Can this be made at home? The answer to the second question is almost always yes. 9 times out of 10, homemade versions of your store bought favorites are much more delicious and basically guilt free. Plus, you can say you made it yourself! That's something to be proud of.

Simple Summer Enchiladas:

What You Will Need-
-Tortilla wraps (I used five sundried tomato wraps.)
-Lean ground beef
(use the right amount according to how many people you are serving. Keep in mind that there will be vegetable fillings as well)
- 1 can of sweet corn
-1 can of black beans (no salt added)
-1/2 cup of chopped baby spinach
-4 tsp of cumin
-2 tsp of paprika
-2 tsp of chili powder
-2 tsp of parsley flakes
-2 chopped garlic cloves
-1 yellow onion
-2 tsp of hot sauce
-3 cups of chicken broth
-3 tbsp of tomato paste
-salt & pepper
-1 cup of mozzarella cheese

1. To start the enchilada sauce: add the chopped garlic, chicken broth, tomato paste, 2 tsp of cumin, 1 tsp of chilli powder, 1 tsp of paprika, salt & pepper, a sprinkling of mozzarella cheese and the 3 tsp of hot sauce to a sauce pan. Stir & then let it simmer for about 30 minutes.

2. As the sauce is simmering, get your other ingredients chopped and ready to be prepared. Throw the onions into a sautee pan with garlic. In the same pan, brown the ground beef until it is cooked thoroughly . Drain the grease out. Season the meat accordingly (add the remainder of the spices)

3. Once the onions, garlic and meat are seasoned and cooked to perfection, add in the chopped baby spinach, black beans (drain & heat up in the microwave first) and corn (drain as well). Stir & let everything cook together.

4. Preheat oven to 375 degrees. As the oven is heating up, drizzle olive oil into a glass baking dish and line up your tortillas evenly spaced.


5. Add the filling to each tortilla, sprinkle a bit of cheese on top and then roll each tortilla up. Once they're all filled & lined up, pour the enchilada sauce over everything & then sprinkle salt, pepper, parsley and more cheese on top.

6. Bake in the oven til it's golden & bubbly!
Enjoy!

Thursday, July 28, 2011

french garlic bread with caramelized onions


Let's face it. Garlic bread is one of those things that everyone loves to shove in their mouths almost any chance they get. It's one of the ultimate comfort foods but after awhile, same ol' garlic bread gets a bit boring. Similar to chicken, bread is the type of food that is simply a canvas just begging to be painted on. So start painting! Get creative with foods like this because the discoveries are endless.

Garlic bread is typically an Italian type of side dish accompanying an equally garlicky main course. So today I decided to experiment with different additions to the basic garlic bread combinations. The outcome was a bit of a French inspired version of the old favorite. The key difference in this recipe that I wanted to focus on are: lemon & rosemary.

Are you willing to take the risk of smelling like you just bathed in a tub of garlic and onions? Okay, good.


What You Will Need:
-Good bread!
(I used sliced italian bread that I had laying around the kitchen and needed to be used up. This is a great recipe that will help you use up the last couple pieces of fresh sliced bread before it goes bad! no waste!)
-One yellow onion (I used half since I didn't make that many pieces)
-Juice of one lemon
-Extra Virgin Olive Oil
-Balsamic Vinegar
-Parsley (Dried or Fresh)
-Two garlic cloves
-Rosemary
-Black Pepper
-2 tbsp of butter
-Good quality shredded mozzarella cheese
-Shredded parmesan cheese

For the caramelized onions-
1. Heat up your sautee pan with a bit of olive oil.
2. Mince one clove of garlic and toss into the pan to infuse the oil, but keep an eye on it to make sure it doesn't burn.
3. Chop up the yellow onion and add to garlic & oil in the simmering pan.
4. Stir the onions, garlic & oil around so everything is evenly coated.
5. Squeeze the juice of 1/2 a lemon into the pan & sprinkle black pepper onto the onions.
6. Add just 1/2 tsp of balsamic vinegar into the pan. Make sure everything is evenly coated.
7. Sautee in the pan on medium until the onions are fully caramelized.

For the French butter & bread-

1. In a small mixing bowl, add the butter (make sure it's at room temperature/a bit soft. if not, put in the microwave for 10 seconds), parsley, pepper, rosemary, 1/2 tbsp of olive oil, juice of 1/2 lemon and garlic (one clove minced) until it is all smooth and evenly mixed. Use a fork to really get in there until it reaches a good consistency.

2. Pre-heat the oven to 375 degrees.

3. As the oven is heating up, line a cookie sheet with tin foil and drizzle a bit of olive oil onto it to avoid sticking.
4. Slice up your bread however you desire and line them up on the sheet.

5. Spread the French butter onto each slice of bread and then add the caramelized onions.

6. After each slice has the right amount of butter and onions on top, sprinkle a bit of shredded cheese to the top. (I used mozzarella cheese & parmesan cheese)

7. Bake until golden brown (about 10 minutes)

enjoy!

Wednesday, July 27, 2011

roasted veggies!


Let me start this off by saying that I just love to cook for people. It's one of the top things in my life that I truly truly love to do. Generally, it's extremely therapeutic to cook. Something about the chopping, dicing, mixing, sauteeing that really puts me in a good mood. On top of all of that, it's an extremely creative process! You are making something from scratch (most of the time) and creating a dish that you and your loved ones can enjoy together. In my opinion, the colors and presentation of the food is just as important as the taste. Everything has to flow together and come straight from your heart.

Two of my favorite vegetables are sweet potatoes and string beans. They have their own little flavors going on but on the whole, they are like little sponges, completely vulnerable to every flavor you want to add to it. That's when food is fun. The challenge of taking a plain ol' string bean and turning it into something delicious.

For this meal, I needed a side dish for my chicken dish (I wish i took pictures! it was just chicken breasts baked in a homemade lemon-scallion-herb sauce. I will make it again, I promise.) and while carbs are always (ALWAYS) fun, vegetables needed to be dealt with. This is where my little orange & green friends enter the situation. For both, I prepared them with the every-day kind of herbs & spices that can be found easily in almost everyone's kitchens :

Not So Boring String Beans:

What You Will Need:
-A bunch of fresh string beans (prepare the right amount for the size of the crowd you're cooking for)
-2 tbsp of Olive oil
-1/2 cup of Chicken broth
-Juice of one lemon
-Salt & Pepper
-1 tsp Onion flakes
- 1 tsp Cumin
-1/2 tsp Red Pepper Flakes
-1 1/2 tsp Garlic powder
-1 tsp Sesame seeds
-1 tsp Parsley flakes
-1 tsp of Oregano

1. Wash the string beans & cut off both ends on each one.
2. Put the string beans into a medium sized mixing bowl
3. Combine all of the ingredients into a small bowl (note: I used a measuring cup) and mix together til a sauce is made
4. Pour the sauce over the string beans so everything is evenly coated.
5. Preheat the oven to 375 degrees and let the beans sit while you take care of the sweet potatoes. (If you're skipping the sweet potatoes, just put the beans on a parchment paper lined cookie sheet & bake them for about 20-30 mins)


Somewhat Spicy Sweet Potatoes

What You Will Need:
-Sweet potatoes (I chopped up three)
-2 tbsp cup of olive oil
-1/2 cup of chicken broth
-Juice of one lemon
-1 tsp of chilli powder
-1/2 tsp of cayenne pepper
-2 tsp of garlic powder
-1 tsp of paprika
-Salt & Pepper

1. Make sure the oven is preheated to 375 degrees
2. Cut up the sweet potatoes, coat them a bit in olive oil and put into a mixing bowl
3. Once they are in the mixing bowl, put them into the microwave for 5 minutes to soften them up
4. While they are softening up in the microwave, combine all of the other ingredients into a small bowl. Wisk together til a sauce is formed
5. Once the 5 minutes are up, remove from microwave and pour sauce over the potatoes
6. Mix together so everything is evenly coated.
7. Transfer potatoes to a parchment paper lined cookie sheet. Leave room for string beans (if you are making them as well) and bake together for 45 minutes.

Enjoy!
Tuesday, July 26, 2011

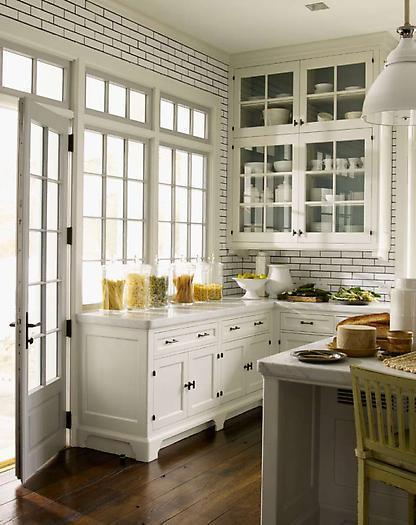
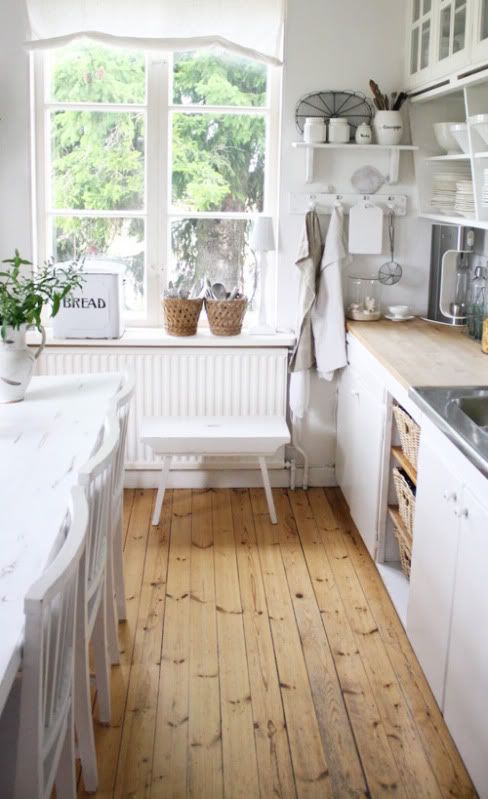
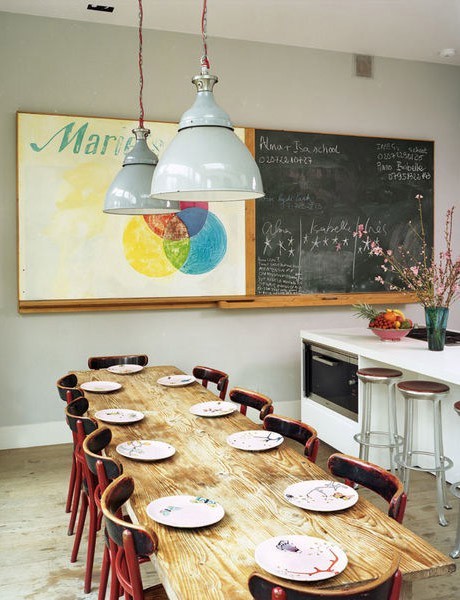
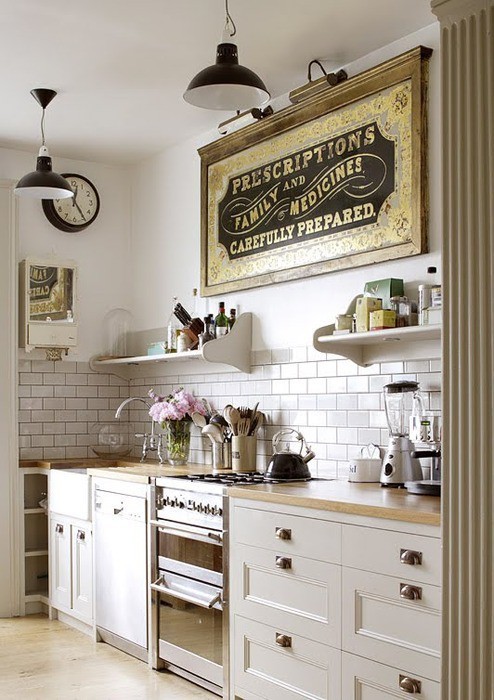
pretty kitchens.


Sometimes I daydream about the day when my kitchen isn't the tiniest thing ever. Don't get me wrong, I love my kitchen in my college apartment. It's tiny but it is perfect for just me. My apartment is very old and I can't change much about the design of the kitchen (hello cabinets. you REALLY need to go, but you cant.) I get by with what i've got.

Since i'm a fan of interior design, it's exciting to think of the day when I can have a big, real life kitchen to decorate.

Here are some beautiful kitchens i've come across lately:

from my ideal home

Let's face it, kitchens are one of the best (if not the best) rooms in a house so it should be well designed and thought out. The colors and all of the little details count. When you love to cook, it's super important to have a comfortable and cozy place to create.